Getting started · Step 3 of 3
Add slabs
Slabs are the floors of a building, added from the ground up. Each new slab goes on top of the last one and is scheduled after it, so you set dates once, on the first slab, and PlyMax places the rest.
Steps
Open the building's tracker
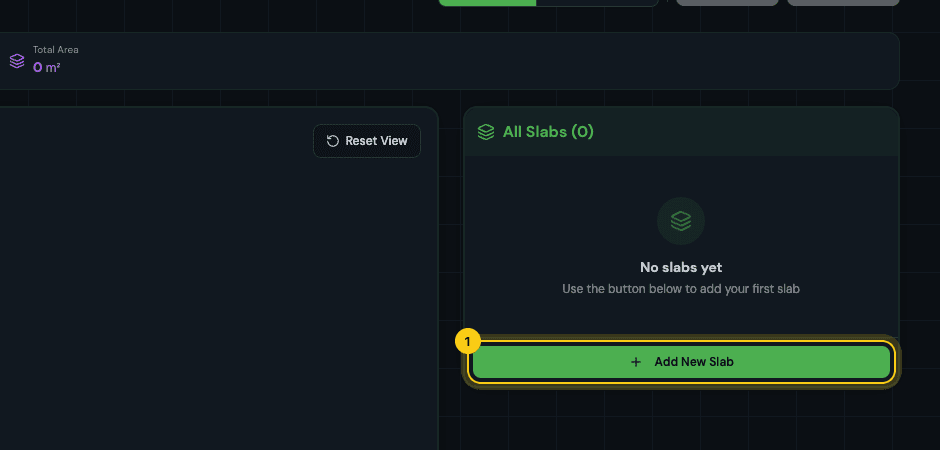
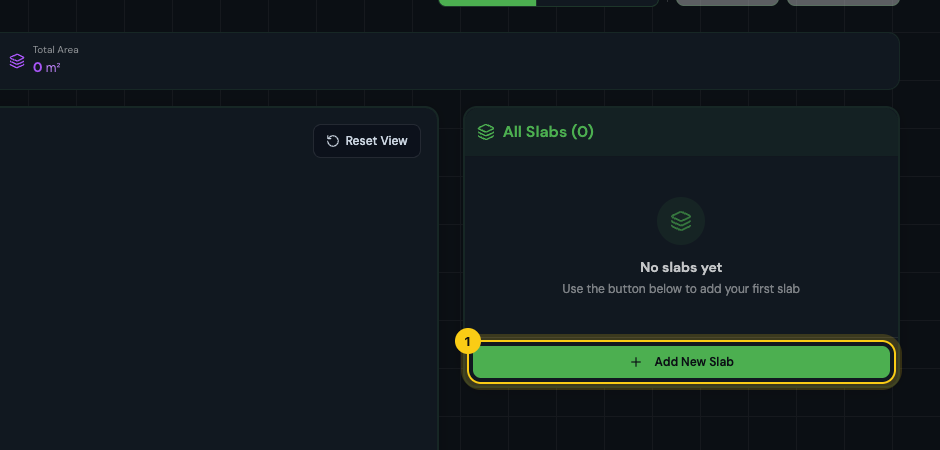
On the project page, click View Tracker on the building's card. The tracker shows the building in 3D with its list of slabs. Click Add New Slab under the list.
Name the slab and enter its area
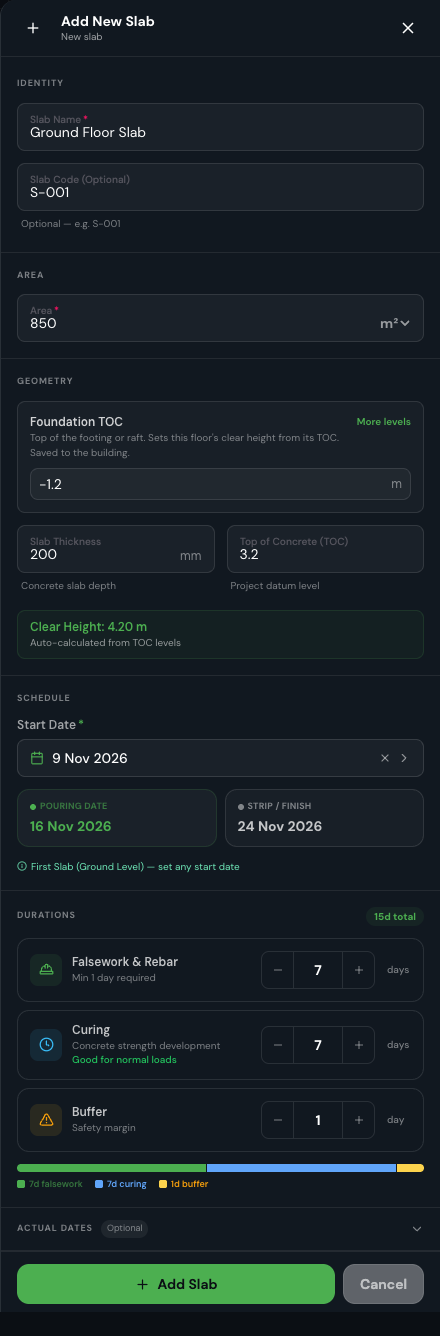
Give the slab a name such as “Ground Floor Slab” and enter its area. Choose m² or ft² from the unit next to the area. Every slab in a building has to use the same unit.
Enter the levels
The levels are optional, but they are what PlyMax uses to size the shoring. Enter the Slab Thickness in millimetres and the Top of Concrete (TOC) in metres on your project datum. For the ground floor, also enter the Foundation TOC: the top of the footing or raft.
With those three values, PlyMax works out the Clear Height, the height the props have to span. It takes this slab's TOC, subtracts the slab thickness, then subtracts the TOC of the level below.
Example — ground floor
TOC 3.20 m − slab 0.20 m − foundation TOC (−1.20 m)
= clear height 4.20 m
Foundation TOC is saved to the building
You enter the Foundation TOC once, on the ground-floor slab. To change it later, or to record the foundation type and the natural ground level, use the Foundation button next to the building name at the top of the tracker. For the floors above, PlyMax measures from the TOC of the slab below. If a level is missing, type the clear height directly.Set the start date and durations
For the first slab, pick any Start Date. Then set how many days each stage takes. PlyMax shows the pouring date and the strip/finish date as you type.
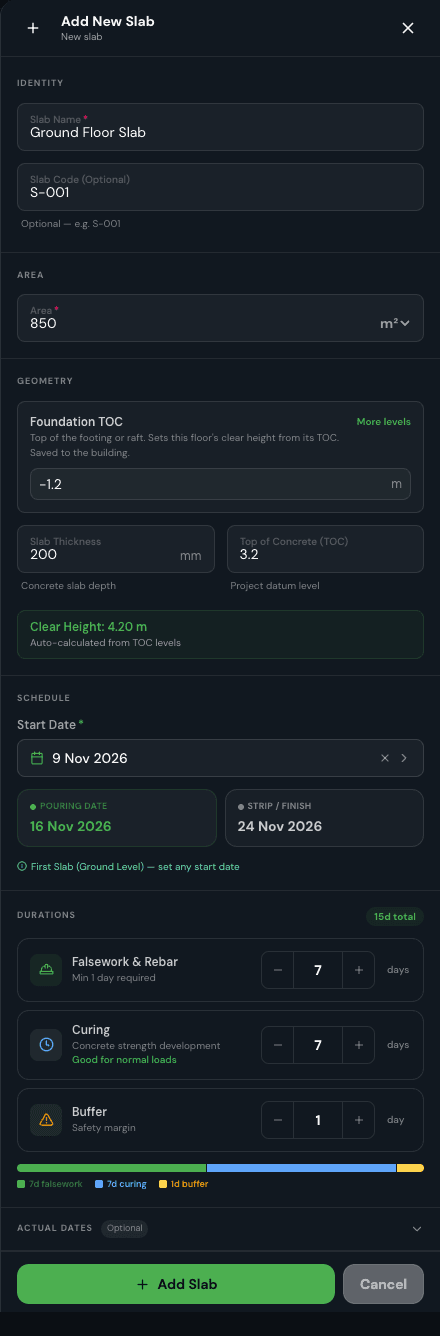
The ground floor: levels give a 4.20 m clear height; 7 + 7 + 1 days. Click Add Slab, then add the next floor
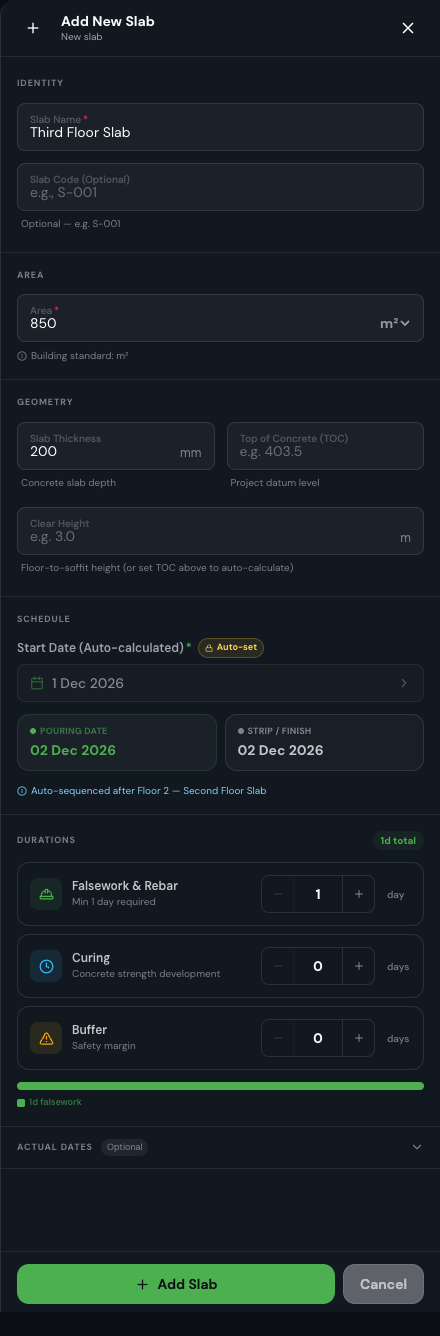
The slab appears in the list and in the 3D view. Click Add New Slab again for the next floor. Now the start date is filled in for you: the day after the floor below is poured. A note under the date shows which slab it follows.
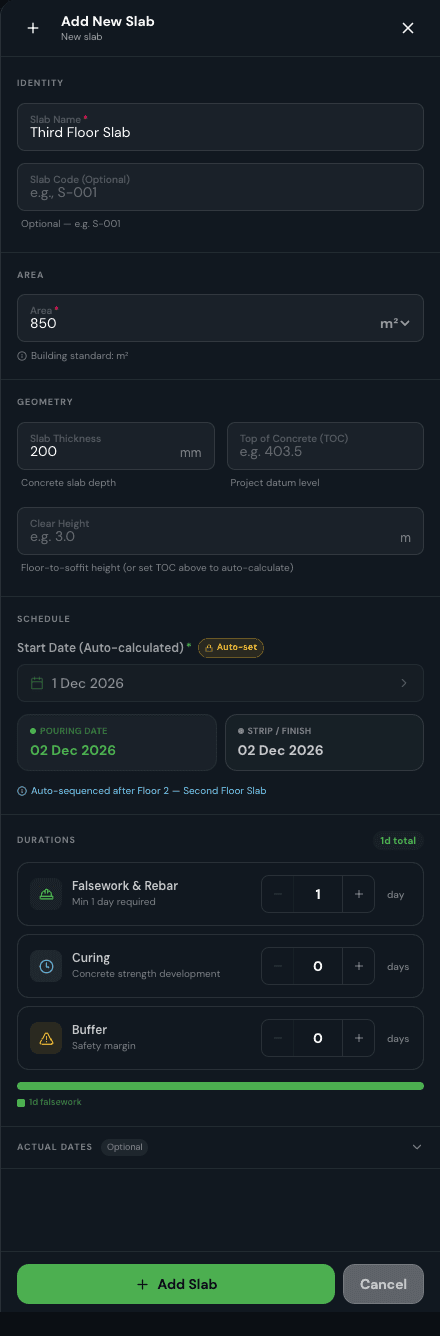
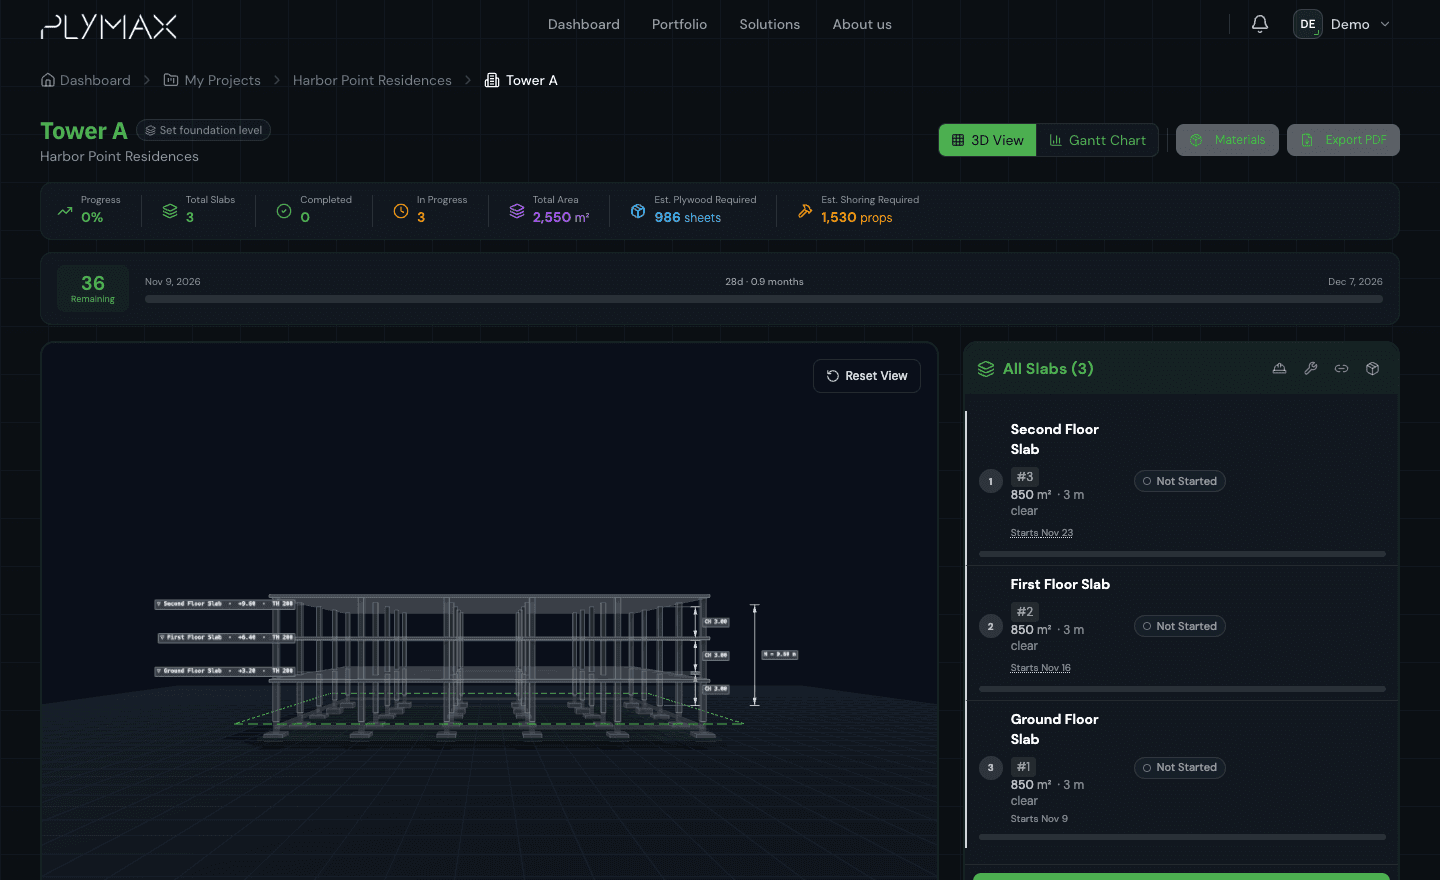
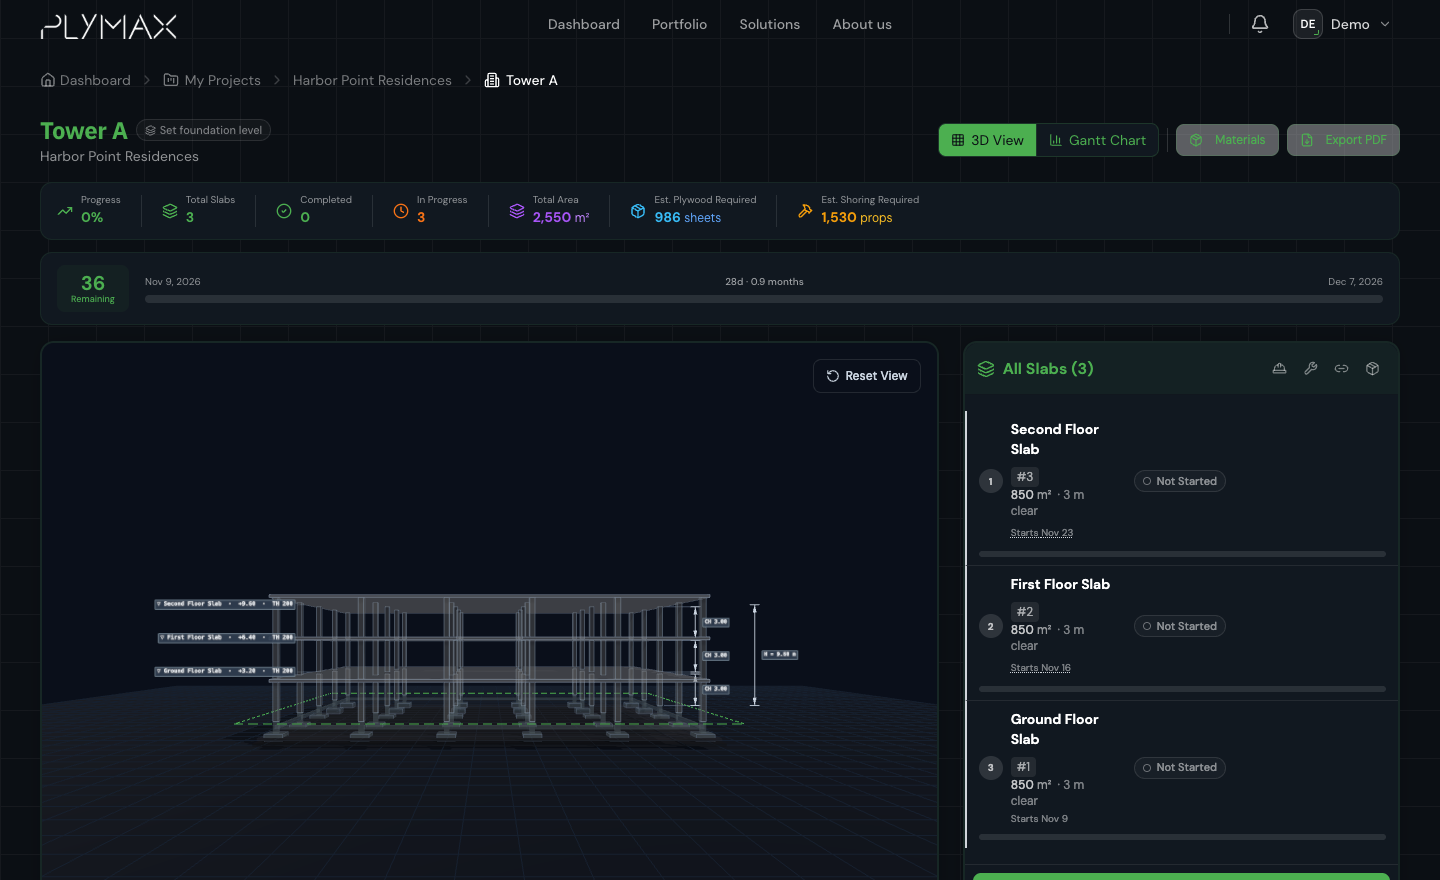
An upper floor: the start date is auto-set from the slab below. Keep going until every floor is in. The tracker then shows the whole building, its timeline and the plywood and props it needs.
Field reference
| Field | What to enter |
|---|---|
Slab Name Required | How the team refers to the pour, e.g. “First Floor Slab”. |
Slab Code Optional | A short reference from your drawings, e.g. S-001. |
Area Required | The slab's plan area, in m² or ft². All slabs in one building use the same unit. |
Foundation TOC Optional | Ground floor only. The top of the footing or raft, in metres on your datum. Saved to the building and used for the ground floor's clear height. |
Slab Thickness Optional | Concrete depth in millimetres. |
Top of Concrete (TOC) Optional | The level of the top of this slab, in metres on your project datum. |
Clear Height Optional | Floor-to-soffit height in metres. Calculated for you when the levels are known; otherwise type it in. |
Start Date Required | When work on the slab starts. Free for the first slab; set automatically for the floors above. |
Falsework & Rebar Required | Days from the start of work until the pour. At least 1. |
Curing Required | Days the concrete cures before the falsework is struck. At least 3; 7 or more is recommended, and 14 gives close to full strength. |
Buffer Optional | Extra days of safety margin before the slab counts as finished. |
Actual dates Optional | The real start, pour and finish dates. Fill them in as work happens, to track progress against the plan. |
Scheduling rules
PlyMax checks these when you click Add Slab, and tells you which one stopped the save:
- Name, area and start date must be filled in.
- Falsework & Rebar must be at least 1 day, and Curing at least 3 days.
- A slab can't start before the falsework of the slab below is finished.
- The area unit must match the other slabs in the building.
Changing the order later