Getting started · Step 1 of 3
Create a project
A project is one site or contract. Create it first: buildings, slabs, materials and your team all live inside it. It takes about a minute, and only three fields are required.
Steps
Open My Projects
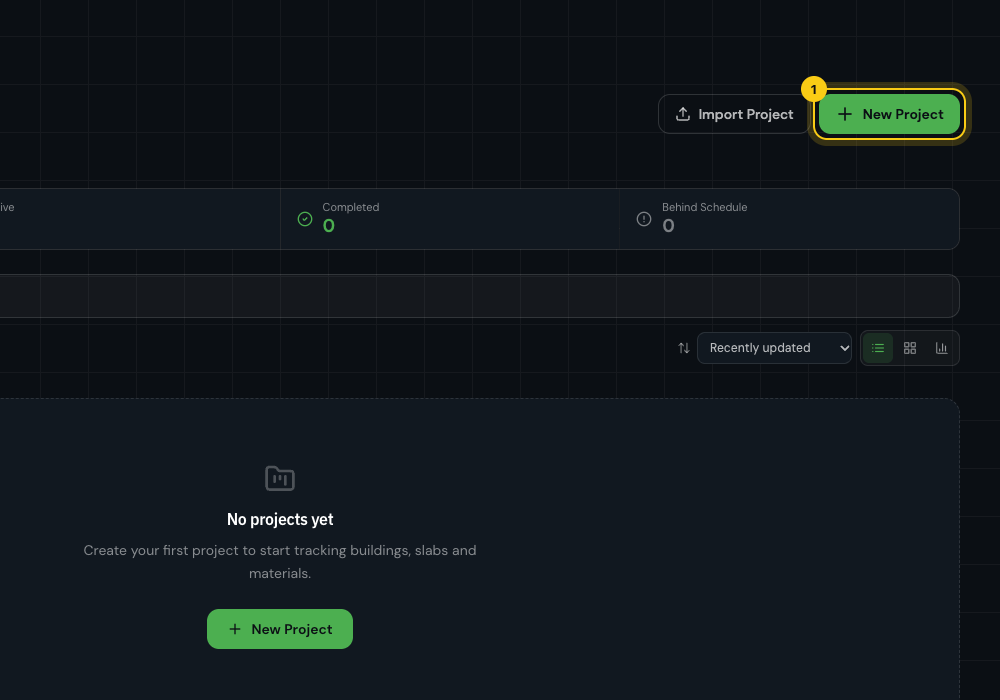
From the top menu choose Dashboard, then My Projects. Click New Project at the top right. On a new account the same button also sits in the middle of the empty list.
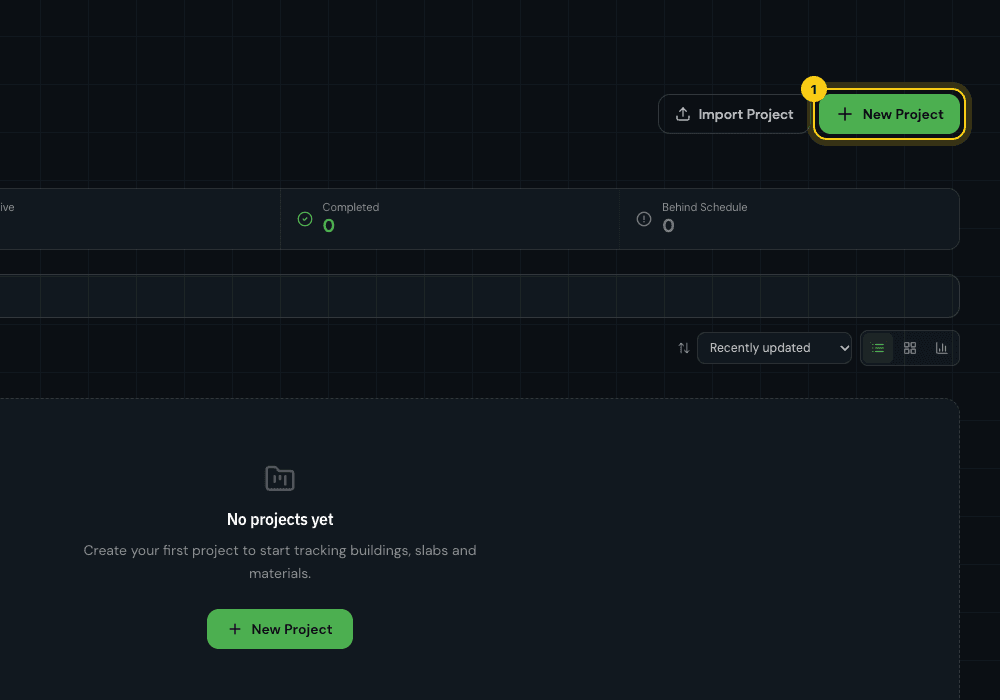
My Projects, with no projects yet. Fill in the project details
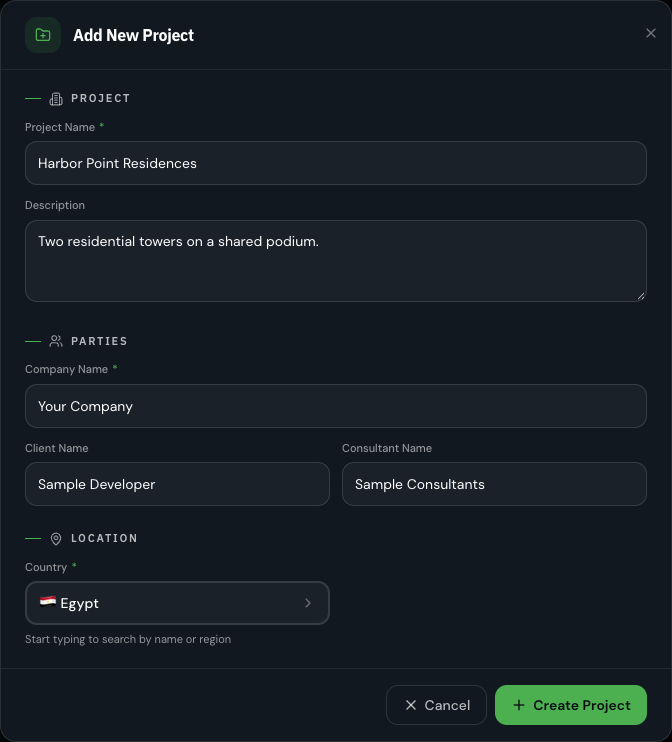
The Add New Project dialog groups the fields into Project, Parties and Location. Fields marked with a green * are required.
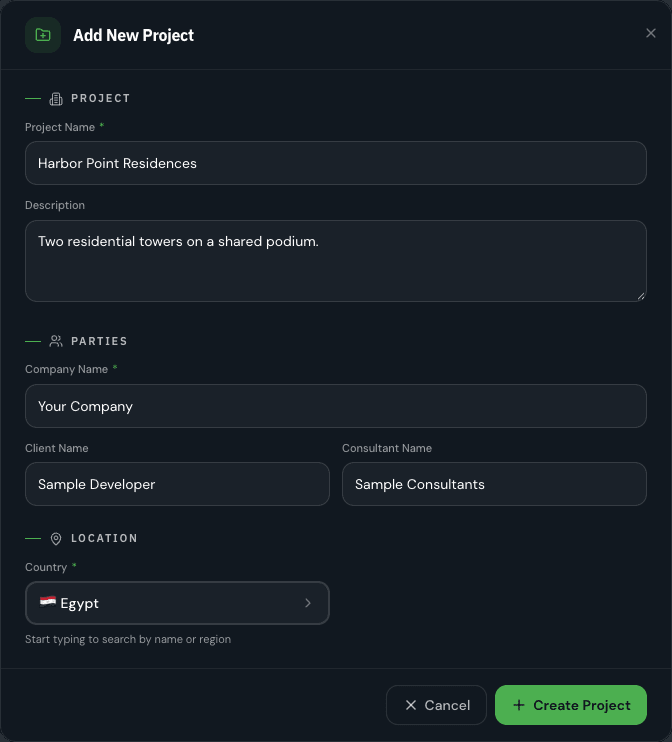
A completed form. Client and consultant are optional. Click Create Project
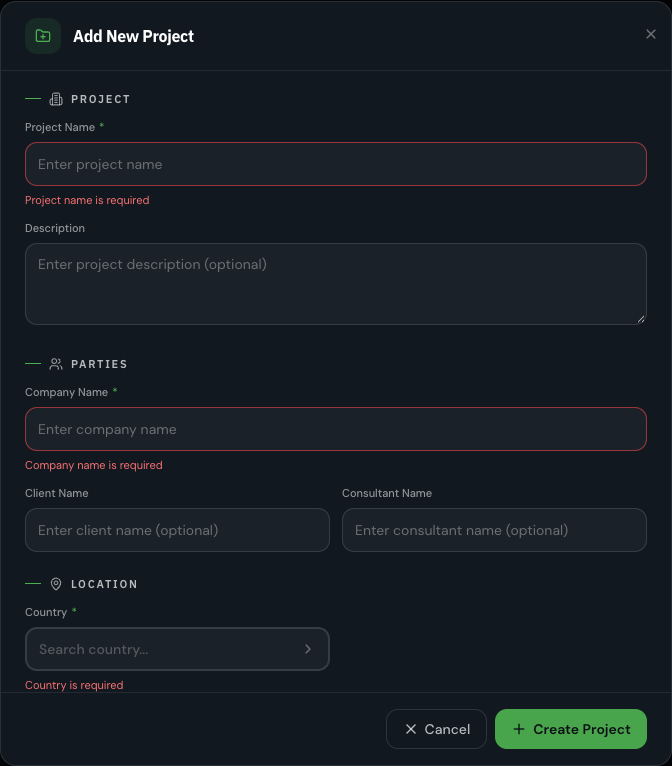
If a required field is empty, PlyMax doesn't save. It outlines the field in red and says what is missing. Fill it in and click Create Project again.
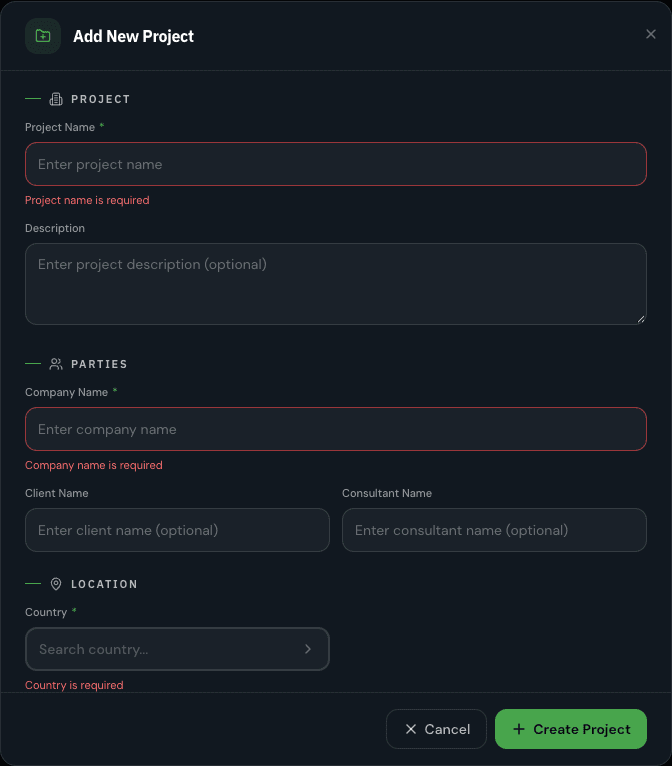
The three required fields, flagged on an empty form. Open your new project
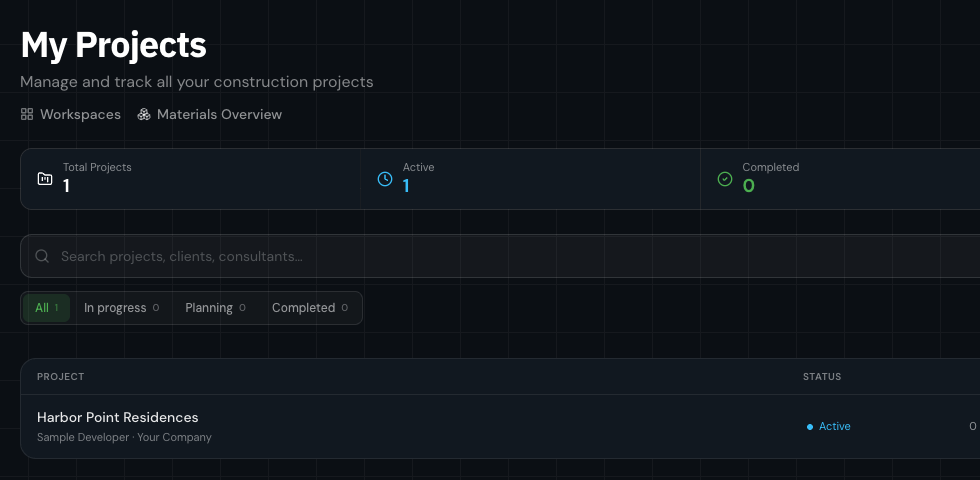
The project appears at the top of My Projects with the status Active. Click its name to open it. That is where you add buildings next.
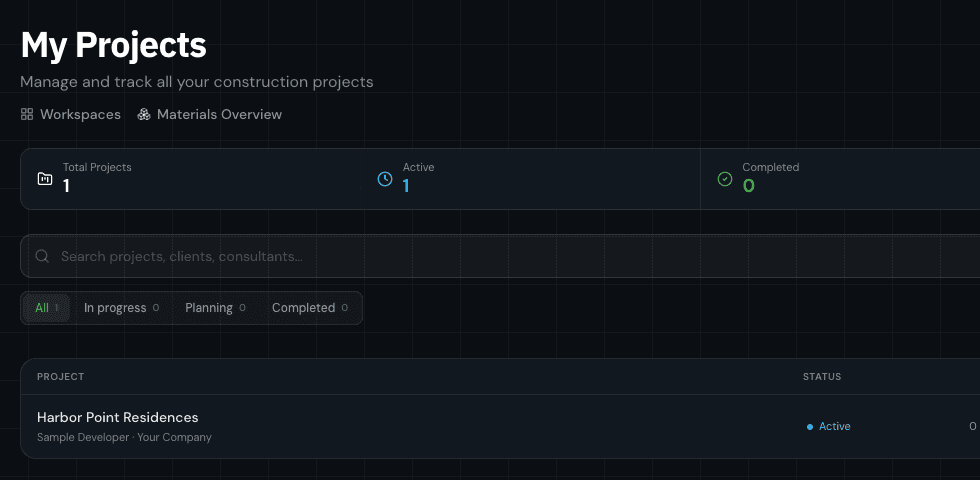
Field reference
Every field on the Add New Project form, and whether PlyMax needs it before it will save.
| Field | What to enter |
|---|---|
Project Name Required | The name your team uses for the site, e.g. “Harbor Point Residences”. It appears on every report and export. |
Description Optional | A line of context, such as the scope or phase. Shown under the project name. |
Company Name Required | The company running the works — usually your own. |
Client Name Optional | The owner or developer you are building for. |
Consultant Name Optional | The engineer or project manager overseeing the works. |
Country Required | Where the site is. Start typing a country or region and pick from the list. It sets the region and currency the project works in. |
Good to know
You can change everything later
Plan limits